Month: September 2014

Sliding Door Installation

Back wall (before cleanup)

Back wall (before cleanup)

Now that the back porch stairs are out of the way, the next step toward getting spray foam installed is installing the back sliding door. My initial plan was to install the new sliding door first and then remove the existing back door, but the two wound up happening concurrently, since there wasn’t anything left to hold the sheathing on. We started by taking off the siding on the outside (fortunately only one layer here). I started and Sarah finished it up.

Sarah removing siding

Sarah removing siding

Once the siding was down I cut back the sheathing, which is when we realized we needed to take out the back door. Sarah did that while I ran to the store and picked up some supplies. We are fresh out of reclaimed 2x4s that are over 10′ tall, which is what we needed to re-frame the wall. That meant I needed to get 12′ 2x6s and cut them down on the table saw to the right thickness (~ 3⅞”).

With the back door gone and all of the sheathing removed, I framed in studs where the old door had been, sistering two studs next to each other to support the cripples above the door. Once that was in place I cut out the studs on the other side to make room for the new door.

The first step in framing the opening was to build a sill, since the balloon-framed house has a sill several inches below the floor. I sandwiched a piece of 1″ thick poly-iso foam between two cut-down 2x6s. That later proved problematic, since the screws that go into the bottom of the door lined up with the foam, so they don’t have any holding power. Ideally I would have put in wood blocks that lined up with the screws, but I don’t think it’s going anywhere. Next I added jack studs, king studs and a header, also sandwiched with foam. Finally I installed sheathing, using reclaimed boards from the house instead of plywood or OSB. It might be cheaper, but after all the screws I used, I’m not so sure.

So far this is all fairly standard. At this point the job gets a bit more complex, as we’re planning 2″ of rigid foam on the outside of the house. To account for this, all the doors and windows sit 2″ further out than normal so they sit flush with the outside, which makes for a simpler flashing detail.

Dean came over to help with the installation, starting with adding the 2×4 furring that surrounds the door. At the bottom we have the existing porch sill, so we cut back the porch flooring and built up the sill to the level of the door. Hopefully when we replace the porch that won’t cause issues. If not, we’ll deal with that when the time comes. Once the furring was on we carefully wrapped it with house wrap. When we eventually re-side the house, the wrap around all the windows and doors will get taped to drain wrap on the rest of the house. For now we left the rest of the sheathing exposed, since it’s inside the back porch.

Adding exterior foam and flashing tape

Adding exterior foam and flashing tape

The next step was to put ½” foam over the 2×4 furring. The 1½” thick furring plus the ½” foam will sit flush with the 2″ of rigid foam. I then used the same flashing detail I’ve done on the other windows and doors, putting 4″ Weathermate tape down the side corners and a plastic sill pan at the bottom. I added a piece of sill gasket under the drain pan to further seal the bottom of the door before we add caulk.

Sliding door installation

Sliding door installation

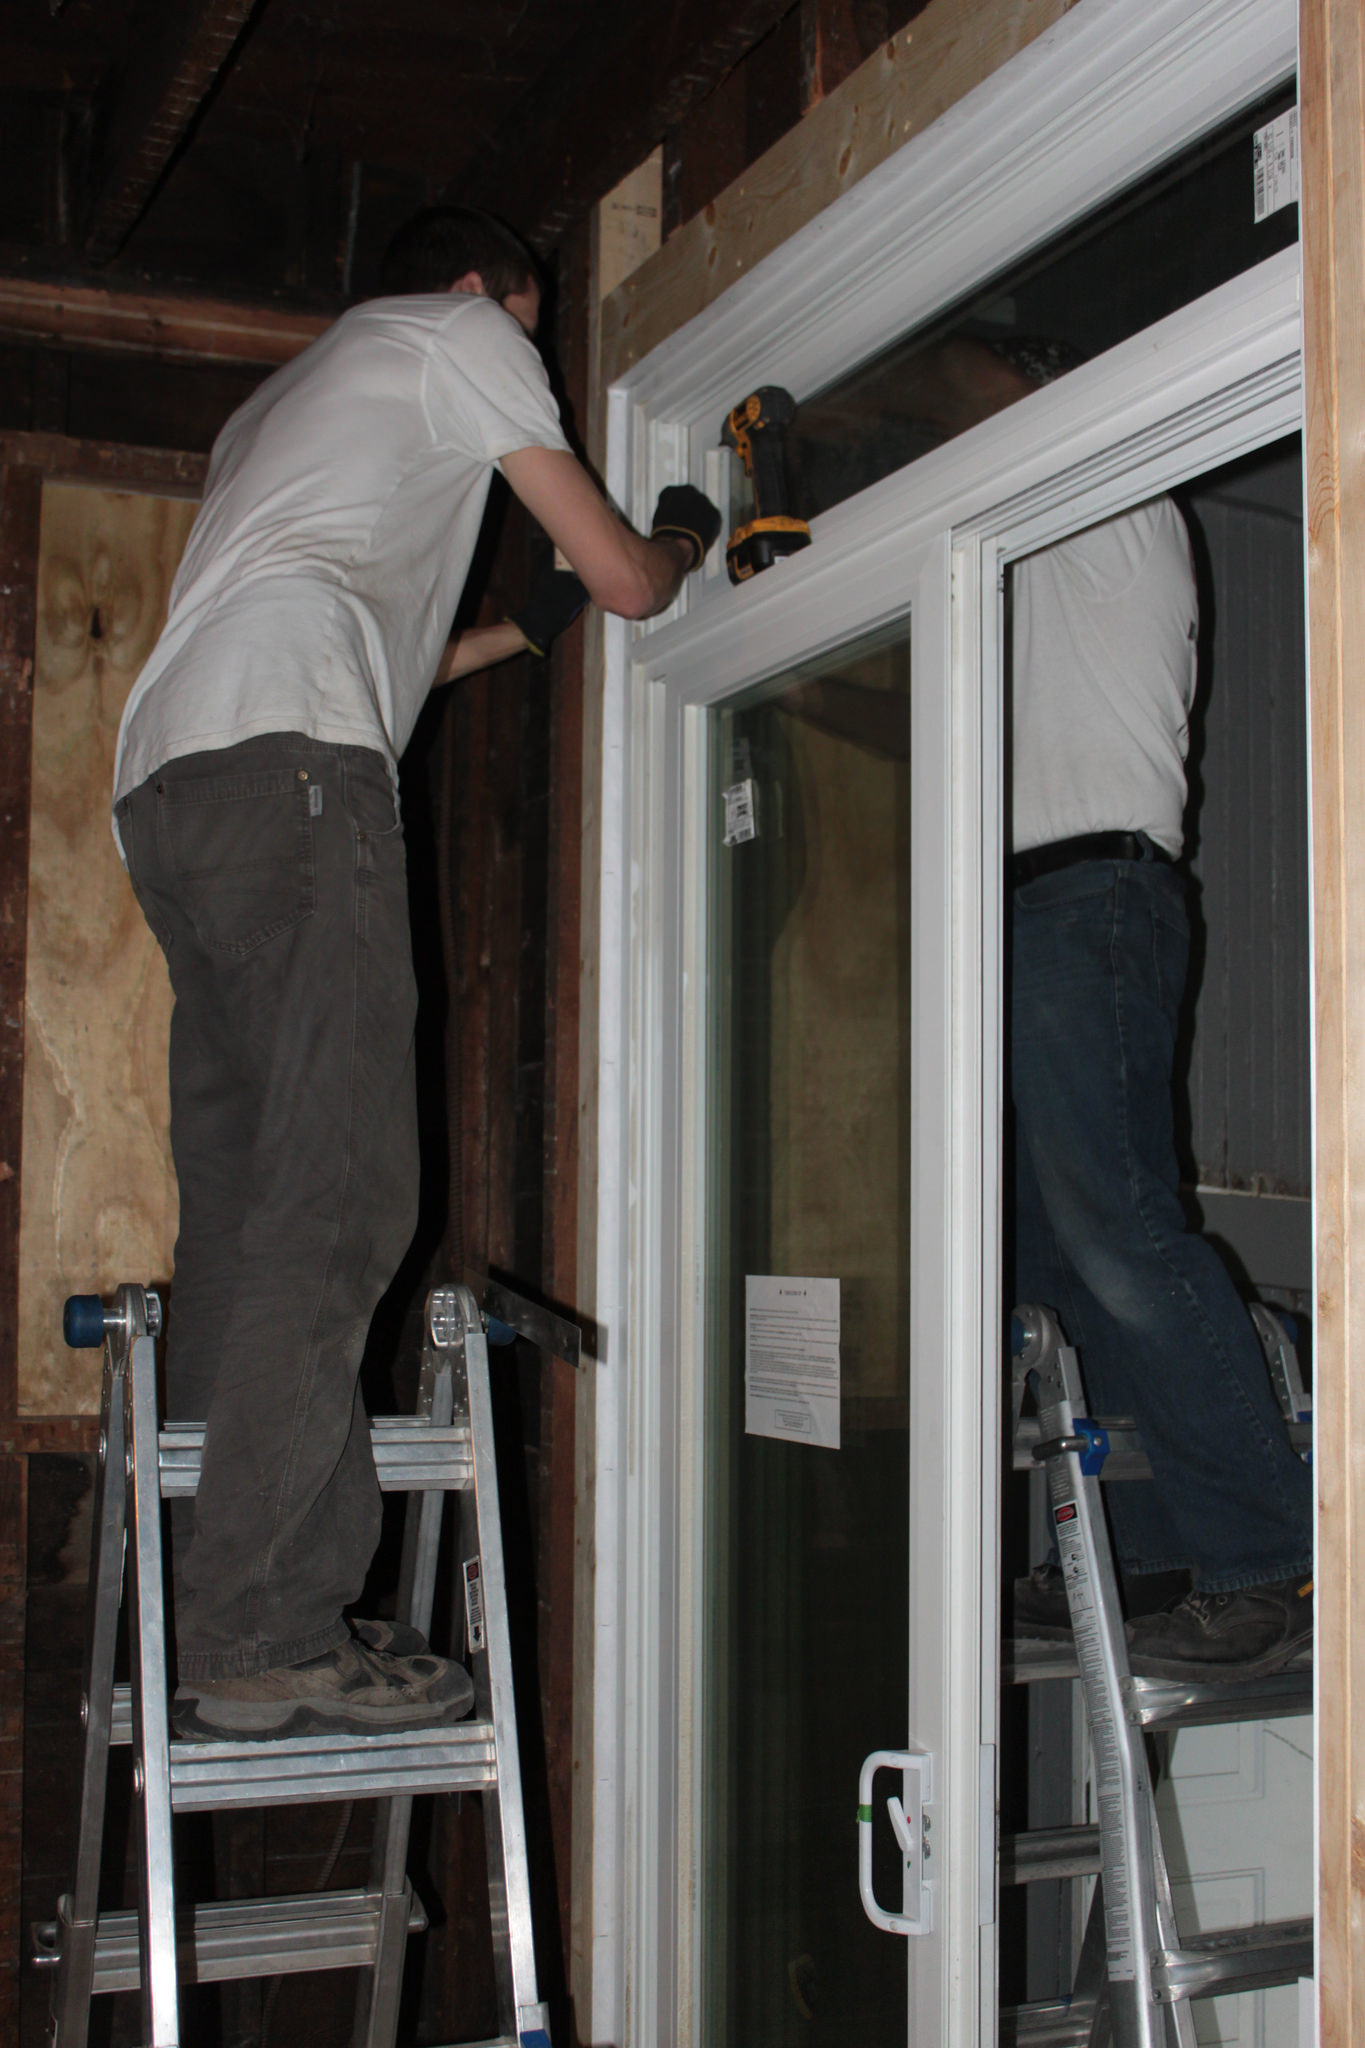
The last step was to tip in the door and screw it into place. We wound up cutting custom wood block shims on the top and side to secure it properly, but everything was level and plumb for a change so it went fairly smoothly. I still need to add more Weathermate tape to the outside at the top and sides to complete the waterproofing, as well as Great Stuff and backer rod on the sides and top, but since this is in the porch there’s no particular rush.

Derek tries out the new door

Derek tries out the new door

The door looks great, and even though it only opens onto the enclosed back porch for now, we can tell it will bring in lot of light once the porch is gone. The relocated light switch is now pretty inconvenient, but I’m sure we can deal with that for the time being. Now we can finish up the fire blocking and get to spray foaming!

Porch Stair Removal

When I originally started building instead of demoing, I was really looking forward to it. Building gives you a sense of progress that demo does not. After demoing you have a sense of accomplishment, but you can’t really say that things are “better” when you’re done. However, after months of construction, going back to destruction felt really good. While it’s really hard to build right, it’s hard to demo wrong.

So, what are we doing? The porch stairs are in the way of the new sliding door that we’re putting at the back of the house. I already moved the electrical, and I got the old radiators that had been sitting on the second floor porch down during the week, so taking out the stairs is the next task. They consist of two runs separated by a landing. The landing also needs to come out, and I need to make railings so that everything is safe for our son Derek.

Upper railing

Upper railing

The process went fairly quickly. I started with the upper railing, taking it off the stairs and re-purposing it to the second floor porch. Then with a bit of sledge hammering and prybarring, I took the treads and risers off, top to bottom. Then I pulled out the stringers, using my reciprocating saw to make short work of it. Next was the floor on the landing, followed by the railing, treads and risers on the lower stairs. Then I took down the structure of the landing and the stringer for the lower run. I left the stringer on the outside wall, since the porch isn’t built very well and I didn’t want to loosen anything (such as siding) by prying against the wall. I did cut the stringer back to make room for the lower railing. This one was a bit more involved, since it was an ‘L’ shape, it wasn’t braced on both sides, and the bottom didn’t rest on framing, so I had to add some reinforcement.

Lower railing

Lower railing

With that all done I started cleaning. I wound up filling two toters with the scraps. There wasn’t much that was worth saving, since it was coated in several coats of unknown paints. So far Derek and Emily have tested for low levels of lead and we want to keep it that way. I have a bit more scrap to cut down so that it will fit in the garbage, but otherwise it’s done. I started planning out the sliding door installation, so that’s the next undertaking. Back to construction!

Porch Electrical Re-Route

Finished stairs

Finished stairs

I finished up the front stairs by installing a new door at the top (into our apartment) and putting on a temporary railing. With that project complete, we can switch our focus to the back sliding door. Our project flips the back porch layout from stairs on the left to stairs on the right, so the new sliding door is going on the left side, where we currently have stairs going to the second floor. Basically, we needed to finish the front stairs in order to take out the back stairs.

Electrical under back stairs

Electrical under back stairs

In addition to the stairs, there’s some surface mounted electrical that services the porch that is in the way. We still want lights on the porch, so I needed to re-route it to the other side of the back door. There’s an old rotary switch that controls the lights on the first floor and the basement, and a line that goes up to the second floor for a separately switched light and an outlet, as well as a flood light for the back yard.

Existing junction and rotary switch

Existing junction and rotary switch

All of this electrical is temporary, so I just re-used the BX and even the rotary switch. I made the switch inline and put the junction above the door, so that it could connect where there was a break in the existing rigid conduit that goes to the second floor. I left the rest of the second floor stuff alone. I had to move the basement light so that the BX headed up to the first floor would be on the other side of the door, but the wiring itself didn’t change.

Relocated by door

Relocated by door

Once I got everything re-connected and wire-nutted, it all worked except for the basement light. My circuit tester had gone into the garbage several months ago because it had a tendency to beep at everything except live wires, so I was left with a bit of trial and error. I’ve since ordered a new tester, but in the mean time I had to figure out what was going on. It turned out to be a swapped neutral and live, which I’m surprised even worked as well as it did. With that straightened out, both lights worked.

All clear

All clear

The only other thing that needs to be done before we take out the porch stairs is to bring down the old steam radiators. Last fall we got them out of the house, but only onto the back porch of each floor. Rather than take them down our new front stair and potentially scratch up the OSB, I’m bringing them down the porch stairs. This is slightly challenging because one of the radiators is actually wider than the steps.