Tag: flashing

Basement Side Bay Windows

Original window

We bought our new basement windows over six months ago, and I’m finally getting around to installing them. When we bought the house, one of the very first orders of business was securing the exterior from rats, weather, and intruders. The two windows on either side of the bay in the basement were in terrible shape so we just boarded them up and they stayed that way until we had the tuckpointing done. We had the tuckpointers put in new concrete sills on the bay windows, but on the two sides we still needed to replace the lintels and add a tier of bricks to either side.

Dean came over and helped me mortar in the bricks on either side of the windows and position the new lintel. There’s no brick above the lintels, since the windows are at the top of the basement wall, but there is a floor joist that rests on the middle of the window, so I wanted to make sure it was supported by more than the buck.

Dean brick laying

Dean brick laying

Because we added the bricks, the already not 100% square opening was made less so, so when it came time to build the bucks we wound doing a lot of careful measuring and shimming. The finished openings were a bit smaller than anticipated and I had to make the sides of the bucks out of 1″ instead of 2″ pressure treated lumber. I secured it to the brick with Tapcons and filled the gaps with backer rod, sill insulation, and canned spray foam.

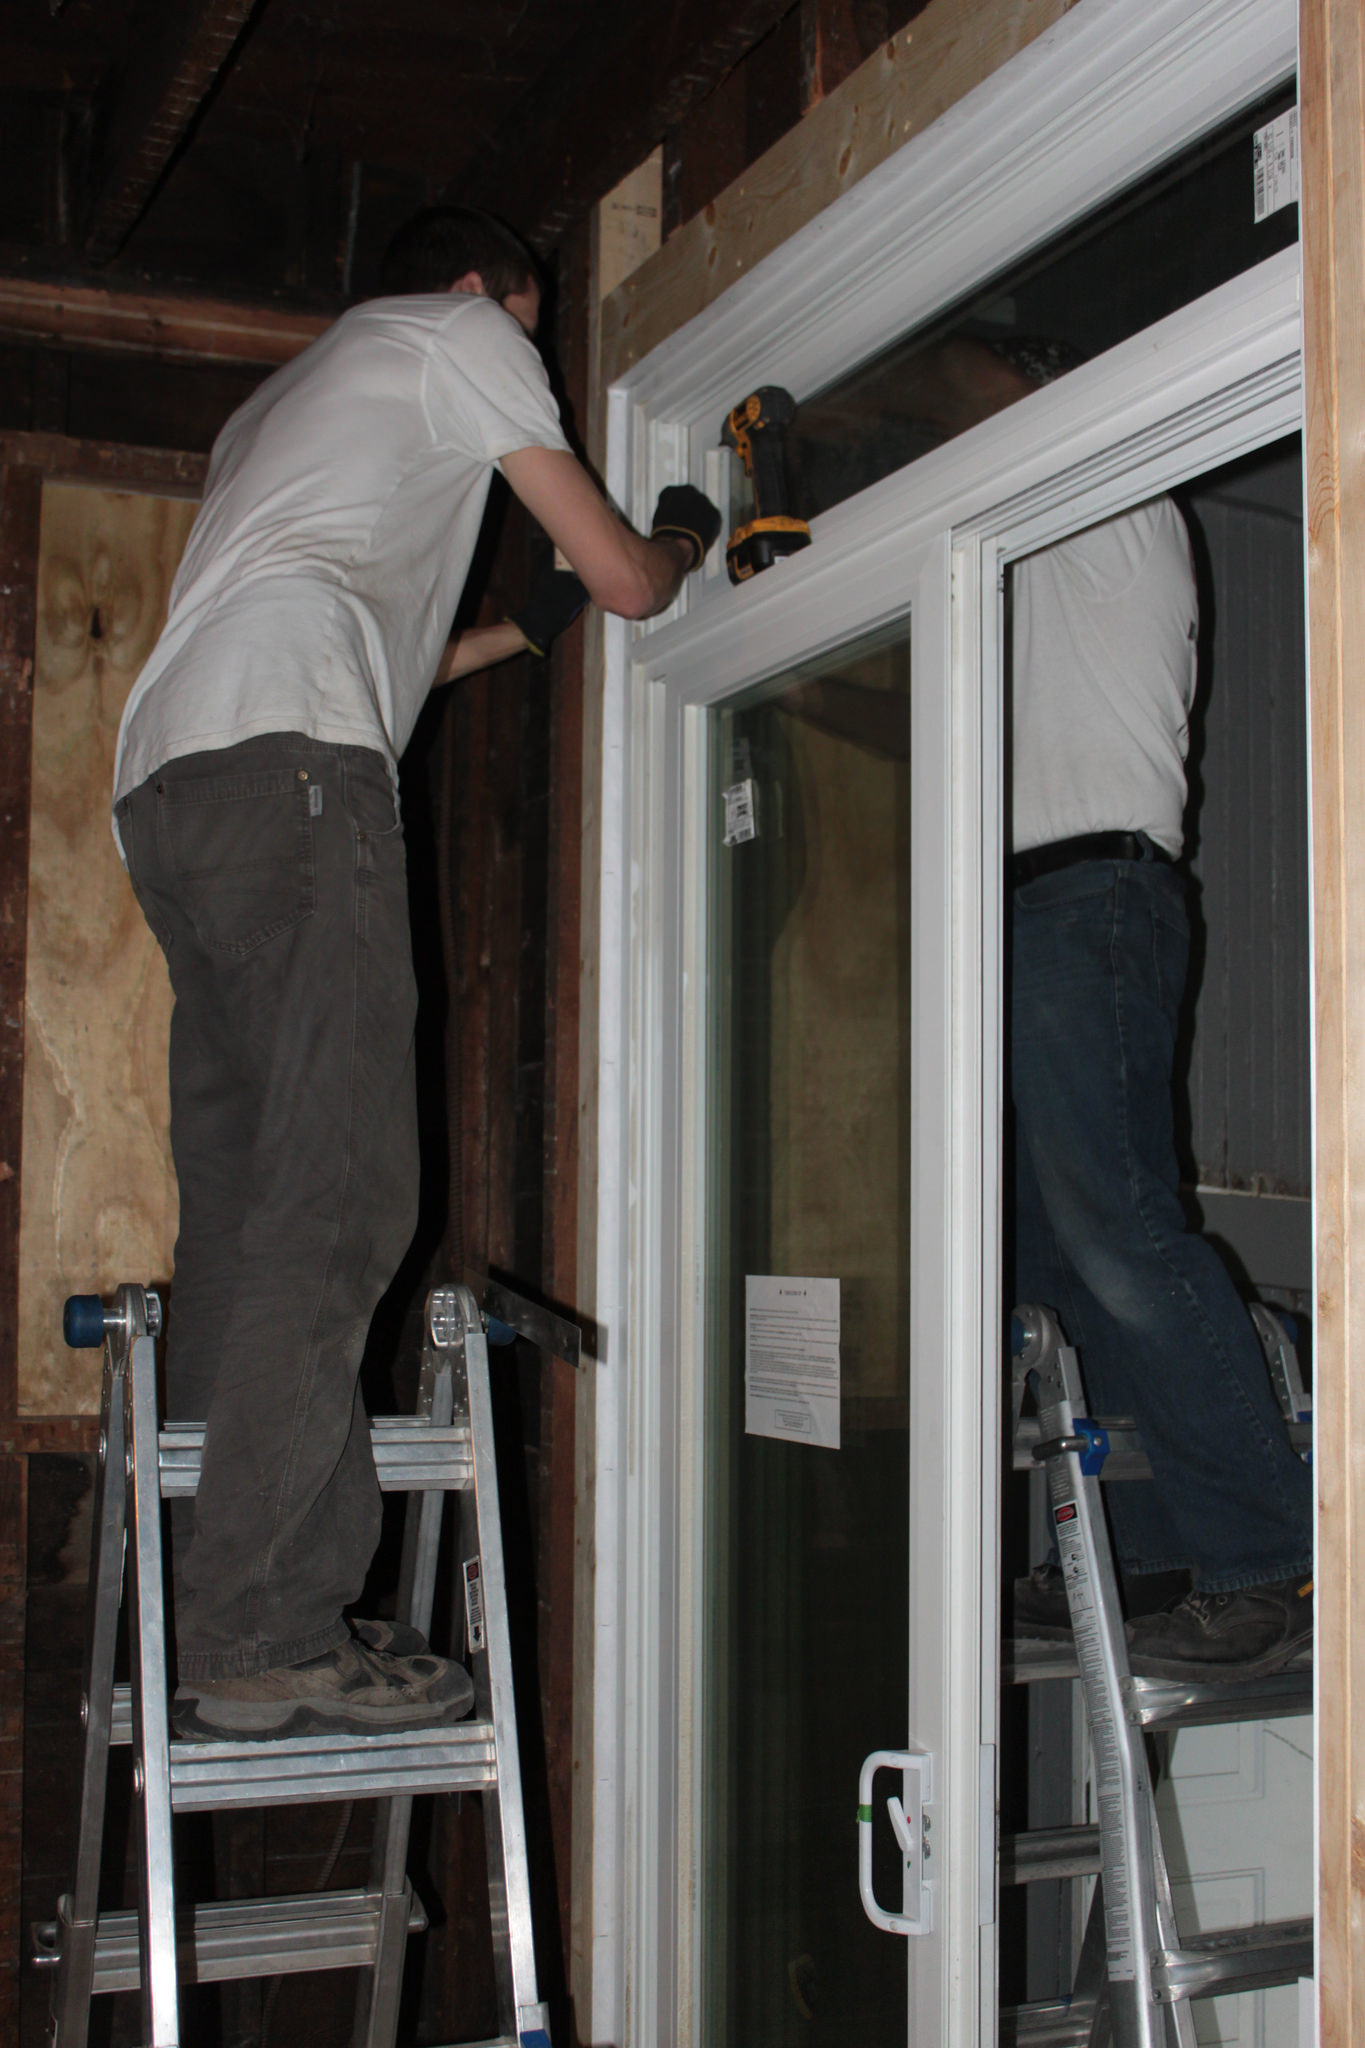
The windows are Newtec R-5 triple pane. We chose casements for the sides so we can direct airflow into the basement. The center window will be a fixed picture window. They’re vinyl, unlike the fiberglass windows we put in the first floor, but they perform better and cost a lot less. The basement windows aren’t especially large, so I’m not too concerned with the vinyl expanding and separating from the glass.

After Dean helped me install the first buck and window last weekend, I installed the one on the other side of the bay on Wednesday and got everything caulked and sealed. I missed one spot on the right window with the Great Stuff that I’ll catch when I’m doing the next one. For now we’re not installing the middle bay window so the opening can be used by plumbers and concrete guys. I’m planning to switch to 2×8 bucks instead of 2×6 for the remaining windows so that they will be flush with the inside of the wall, which will simplify framing and trim later.

Sliding Door Installation

Back wall (before cleanup)

Back wall (before cleanup)

Now that the back porch stairs are out of the way, the next step toward getting spray foam installed is installing the back sliding door. My initial plan was to install the new sliding door first and then remove the existing back door, but the two wound up happening concurrently, since there wasn’t anything left to hold the sheathing on. We started by taking off the siding on the outside (fortunately only one layer here). I started and Sarah finished it up.

Sarah removing siding

Sarah removing siding

Once the siding was down I cut back the sheathing, which is when we realized we needed to take out the back door. Sarah did that while I ran to the store and picked up some supplies. We are fresh out of reclaimed 2x4s that are over 10′ tall, which is what we needed to re-frame the wall. That meant I needed to get 12′ 2x6s and cut them down on the table saw to the right thickness (~ 3⅞”).

With the back door gone and all of the sheathing removed, I framed in studs where the old door had been, sistering two studs next to each other to support the cripples above the door. Once that was in place I cut out the studs on the other side to make room for the new door.

The first step in framing the opening was to build a sill, since the balloon-framed house has a sill several inches below the floor. I sandwiched a piece of 1″ thick poly-iso foam between two cut-down 2x6s. That later proved problematic, since the screws that go into the bottom of the door lined up with the foam, so they don’t have any holding power. Ideally I would have put in wood blocks that lined up with the screws, but I don’t think it’s going anywhere. Next I added jack studs, king studs and a header, also sandwiched with foam. Finally I installed sheathing, using reclaimed boards from the house instead of plywood or OSB. It might be cheaper, but after all the screws I used, I’m not so sure.

So far this is all fairly standard. At this point the job gets a bit more complex, as we’re planning 2″ of rigid foam on the outside of the house. To account for this, all the doors and windows sit 2″ further out than normal so they sit flush with the outside, which makes for a simpler flashing detail.

Dean came over to help with the installation, starting with adding the 2×4 furring that surrounds the door. At the bottom we have the existing porch sill, so we cut back the porch flooring and built up the sill to the level of the door. Hopefully when we replace the porch that won’t cause issues. If not, we’ll deal with that when the time comes. Once the furring was on we carefully wrapped it with house wrap. When we eventually re-side the house, the wrap around all the windows and doors will get taped to drain wrap on the rest of the house. For now we left the rest of the sheathing exposed, since it’s inside the back porch.

Adding exterior foam and flashing tape

Adding exterior foam and flashing tape

The next step was to put ½” foam over the 2×4 furring. The 1½” thick furring plus the ½” foam will sit flush with the 2″ of rigid foam. I then used the same flashing detail I’ve done on the other windows and doors, putting 4″ Weathermate tape down the side corners and a plastic sill pan at the bottom. I added a piece of sill gasket under the drain pan to further seal the bottom of the door before we add caulk.

Sliding door installation

Sliding door installation

The last step was to tip in the door and screw it into place. We wound up cutting custom wood block shims on the top and side to secure it properly, but everything was level and plumb for a change so it went fairly smoothly. I still need to add more Weathermate tape to the outside at the top and sides to complete the waterproofing, as well as Great Stuff and backer rod on the sides and top, but since this is in the porch there’s no particular rush.

Derek tries out the new door

Derek tries out the new door

The door looks great, and even though it only opens onto the enclosed back porch for now, we can tell it will bring in lot of light once the porch is gone. The relocated light switch is now pretty inconvenient, but I’m sure we can deal with that for the time being. Now we can finish up the fire blocking and get to spray foaming!

Window Week

I took off work all last week to instead work on the house. After we installed the door on Sunday, I spent Monday doing some follow-up tasks like replacing the handleset with one that fit and matched the door, plus reinstalling the porch railings, mailbox, and doing some weather sealing. With that finished I got to work on the windows.

We installed the first window a few weeks back and I figured out the details and made a couple of tweaks to the plan. Tuesday, Wednesday, and Thursday I installed a window a day. Each one took roughly twelve hours start to finish. The reason it took so long was all of the steps in the process. I’m pleased to say I didn’t need to make a single trip to the hardware store to do these windows and the whole thing went smoothly, it was just very time consuming.

Here’s the rundown of the process: first I removed the existing window, established the exact window height with the laser level, reframed the opening using existing lumber and modern window framing methods (king post, jack post, header, and cripples), removed all three layers of exterior siding to expose at least 6″ of sheathing around the window opening, installed new sheathing to account for the higher sill, and built jamb extensions. With everything framed, I stapled on housewrap with taped seams, installed two layers of 1″ polyiso foam insulation with staggered and taped seams, flashed the window opening with a sloped Weathermate plastic sill pan and 4″ tape. At that point Sarah helped me fit the window into the opening and screw the facing clips through the foam and into the framing. With everything secure, the last step was to apply more of the 4″ tape to the sides and top, sealing everything up. I’ll come back through later and fill the gaps on the inside with Great Stuff and foam backer rod.

Bay with siding removed

Bay with siding removed

Friday I was running low on some materials and I went to the store, then started removing the siding around the front bay, which has three windows. I discovered that the decorative sheathing had a frame that meant I had to do it all at once rather than just the 6″ around the window. Saturday we wound up completely removing the framing on the front section of the bay and rebuilding it with new sheathing. Unfortunately after putting everything together, the window didn’t fit into the opening. Between the existing studs and the taper of the lumber, we’d managed to build a parallelogram. All the dimensions were right, but it wasn’t square. We wound up unscrewing one side of the jamb extension and cutting down the length of the jack post stud at an angle to make it straight enough to fit the window. We didn’t get the window screwed in until 11:15 at night.

We still have two more bay windows to go, but this week I’m back at work, so I’ll need to figure out when I can get them in. I’ll be sure to check for plumb studs as I go to avoid a repeat of the last window. Thanks to Will for helping us on Saturday!

New bay window

New bay window

Iron Front Door Installation

All right, front door installation time. Because we’re putting two inches of poly-iso foam insulation on the outside of the house, I had to blend a number of installation methods, starting with  the Building Science instructions for both the door and the transom window. We didn’t want to remove the existing porch, and we plan to have a porch in the future, so we used the Green Building Advisor ledger attachment detail to plan around that, and of course we had the instructions from the door manufacturer.

Before any of that could happen, Sarah and I stripped off three layers of siding from around the existing front door. The top layer was vinyl, followed by old cement fiber siding, and finally wood clapboard siding. Interspersed were layers of old paper house wraps.

Next we turned to the new door. When the door was delivered, we tore open enough of the packaging to make sure it was undamaged and then left it until now. Sarah started peeling back the cardboard and foam and asked, “Why does the glass look shattered?”

Broken door glass

Broken door glass

We really don’t know how this happened. The door has been leaning against the wall in the same spot for a month and a half. The glass is actually broken on the other side —that is— the side with the wrought iron. We can only speculate as to what caused it. I contacted the manufacturer and they’re going to have a glass company come and replace it. I’m really impressed by their customer service, since they could easily argue that it happened after I accepted delivery and that it wasn’t their problem. In any case, it wasn’t enough to postpone installation, we’re just really upset about it.

The door crew

The door crew: Dean, Mike (Sarah’s dad), Matt B, and Eriq

Sunday morning the door crew arrived, comprised of regulars to our house project. Dean and I got the old door out of the way and cut out two additional studs. We propped up the wall with some temporary boards while we framed in the header, just in case the house got a case of the saggies.

Trimming the sheathing

Trimming the sheathing

I’ve gotten pretty handy with a reciprocating saw. Once we framed in a sill plate, jack posts, a 2×4 between the door and transom, and a proper header (spaced with insulation), we nailed 2x4s flat on the outside around the opening. We wrapped the edges with housewrap and then attached ½” foam on top of the 2x4s. That way the two inches of foam on the rest of the house will be the same thickness as the edge around the door. We used WeatherMate flashing tape and sill pans to flash around the edges and make everything water tight.

Then we slid the door frame into position and tipped it into place. We put in one bolt in the top corner and then pivoted it a tiny fraction of an inch to get it perfectly level before putting in the remaining lag bolts to secure it to the inside of the framing. The transom was attached from the outside with facing clips that were screwed through the foam and into the framing, just like the other windows. With some exertions from Eriq and a lot of yelling we got the door hinges aligned and the door onto the frame.

Iron door installed

Iron door installed

We realized that my existing handleset with an interior lever wouldn’t work because the lever didn’t clear the frame of the window in the door, so I picked up a replacement with a knob. The matching rubbed bronze looks better with the door than satin nickel anyway. I also put in backer rod around the edges and filled the gaps with Great Stuff foam and Sarah finished the interior with another layer of backer rod.

For the time being it looks kind of silly on our otherwise crappy-looking house, but eventually when the rest of the house catches up to the door, it’ll be amazing. As always, I have to finish my post with Sarah and my heartfelt thanks to everyone that helped: Dean, Mike, Matt B and Eriq. Thanks, guys!

Window Installation Planning

A couple months ago we ordered our new windows for the first floor. Since then I’ve been mulling over how we’ll install them. One of the challenges of our house remodel is the order we chose to do it. Rather than do it the “right” way, we complicated things in two ways. First, we’re living in the house while we’re rehabbing, which complicates things like our plumbing and HVAC. Second, we’re doing the inside first, the outside second, and the basement last, which complicates things like our mechanical room in the basement and the windows.

Window removed

Existing window framing

When our house was built, they put up the stud walls, put on the sheathing, then came back and cut holes in the wall and put windows into them. This is a strange way to go about things. It means that there is no structural support that carries the load around the windows. In order to put in new windows we have to re-build the opening with proper modern framing. That means a header, king studs, jack studs, the whole works.

Window framing (new framing in white)

Window framing (new framing in white)

In addition, we’re planning to put two inches of rigid foam insulation on the outside of the house, which means we’re building out plywood window boxes to align with that future edge. In order to install the window properly and make it weather-tight, we need to flash it properly by adding a sill pan and taping it to the foam (that isn’t there yet) then installing the window and taping that to the foam. In short, there needs to be foam.

This means in addition to removing and re-framing the window opening, we need to remove six inches to a foot of siding around the windows, add house wrap and two inches of foam, then install the sill pan and window and flash it all properly. In a few years when we re-side the outside, we’ll tape the house wrap and foam around the windows to the rest as we go.

Rigid insulation around window opening

Rigid insulation and house wrap around window opening (existing siding not shown)

We’ll be picking up the windows this Saturday, along with some of the materials we need. We’ll probably be sitting on them for a little bit while we work on the mechanical room, but we do want to get them in while the weather is still nice.